

Flat plate solar collectors are one of the most reliable and widely used technologies for solar water heating systems around the world. They are known for their durability, simplicity, and excellent long-term performance. However, to fully benefit from these advantages, correct installation is absolutely essential.
Even high-quality products can fail if improperly installed. Leaks, misting inside the collector, or reduced thermal performance are almost always caused by mistakes during installation. This guide provides a complete step-by-step explanation for handling, positioning, orienting, connecting, and insulating a flat solar collector system.
1. Handling and Unpacking Flat Plate Collectors
Before the installation of any flat plate solar panels, proper handling and unpacking are critical to prevent damage and ensure long-term durability. Flat solar collectors are precision-made devices that must be treated carefully from the moment they arrive on-site.
-
Unpacking precautions: Use appropriate tools when opening the packaging. Do not use sharp objects that may scratch the glass cover or absorber plate. Always cut packaging gently from the edges.
-
Avoid premature exposure: Never remove the protective packaging and leave the collector under direct sunlight before installation. A flat panel solar collector heats up quickly when exposed, which can burn workers.
-
Shading during installation: Cover the glass surface with cloth or shading material during installation. This prevents overheating and protects installers from accidental burns.
-
Safe lifting: Collectors are heavy and should always be lifted by at least two people. Use lifting straps or suction tools for the glass. Never lift the collector by its manifold or pipe connections, as this can cause permanent deformation.
-
Storage: If collectors need to be stored before installation, keep them in a shaded, dry, and cool area. Stack vertically, never horizontally, and avoid placing heavy objects on them.
-
Keep dry before filling: Install the collector dry. Do not fill with water until all connections are complete to avoid trapped air and pressure imbalances.
Correct handling ensures the solar flat collector efficiency is maintained from day one.
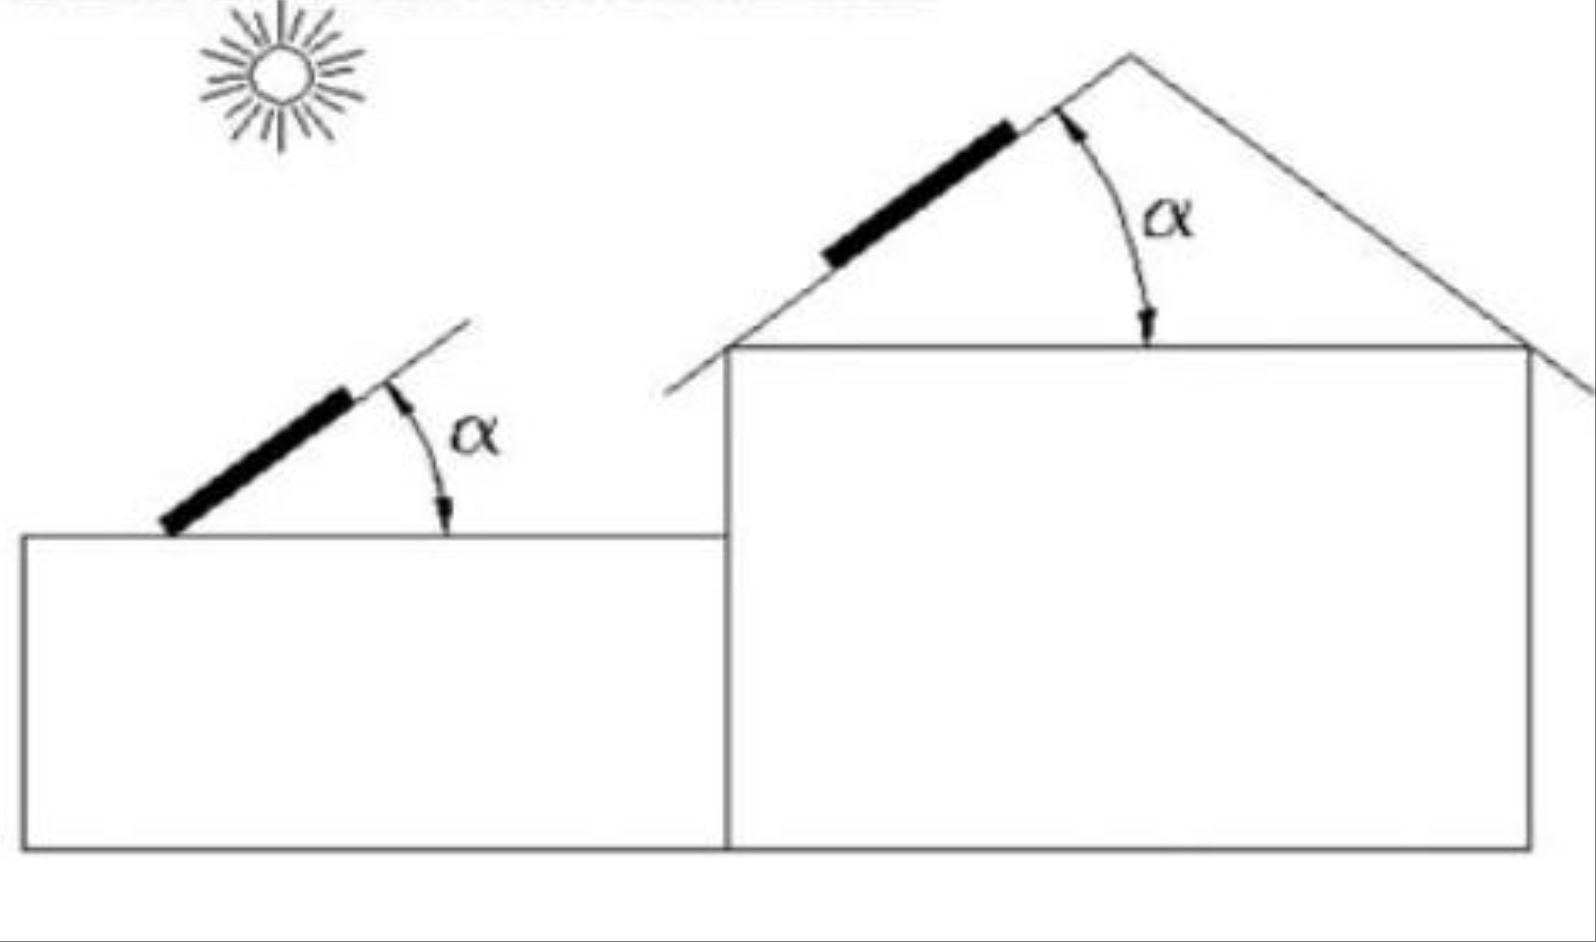
2. Installation Angle
The angle of installation has a direct influence on the efficiency of flat solar thermal collectors.
-
Recommended range: Install at an angle of 20° to 70° relative to horizontal.
-
Latitude guideline: For most locations, the ideal angle equals the local latitude. For example, at 30° latitude, tilt the collector between 30°–35°.
-
Winter optimization: For systems designed mainly for winter hot water supply, tilt = latitude + 10°.
-
Summer optimization: For seasonal systems like swimming pool heating, tilt = latitude – 10°.
-
Structural integrity: Ensure the mounting surface is strong enough to carry the collector weight plus water load. Always use corrosion-resistant mounting brackets.
Correct installation angle maximizes flat solar collector efficiency and ensures stable hot water production throughout the year.
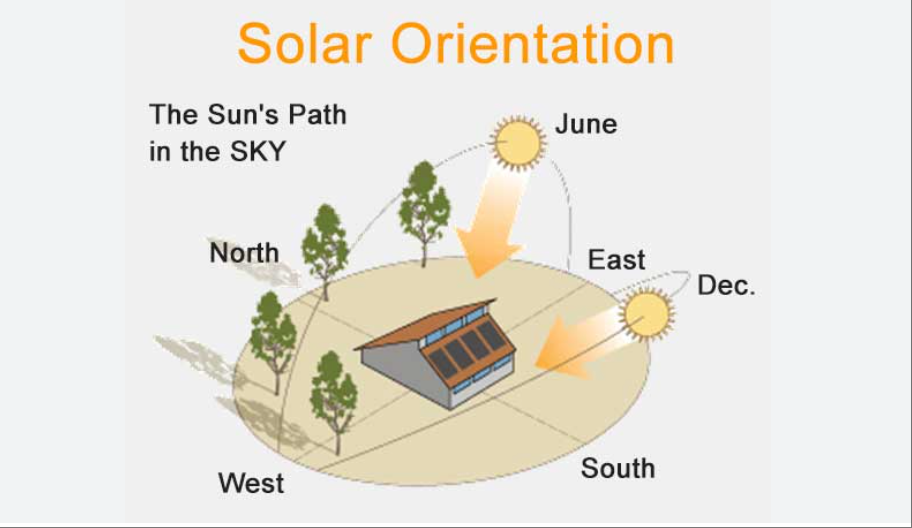
3. Orientation
Orientation is just as important as tilt angle for flat plate solar heating systems.
-
Northern Hemisphere: Collectors should face true south.
-
Southern Hemisphere: Collectors should face true north.
-
Deviation: A deviation of ±15° from the optimal direction only slightly reduces performance, but beyond ±30°, the loss becomes significant.
-
Shading check: Ensure there are no obstructions such as trees, antennas, or buildings casting shadows on the collector during key sunlight hours. Even one to two hours of shading can reduce daily output significantly.
-
Mount adjustments: If the roof is not aligned, adjustable mounting frames can be used to correct orientation.
Correct orientation ensures a domestic solar collector system performs at maximum output every season.
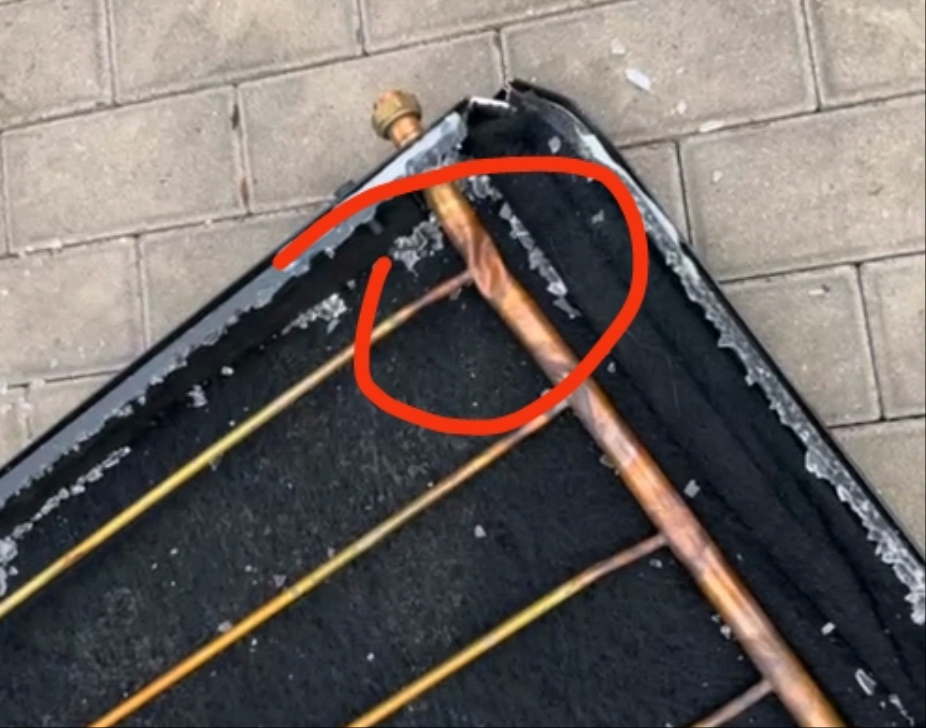
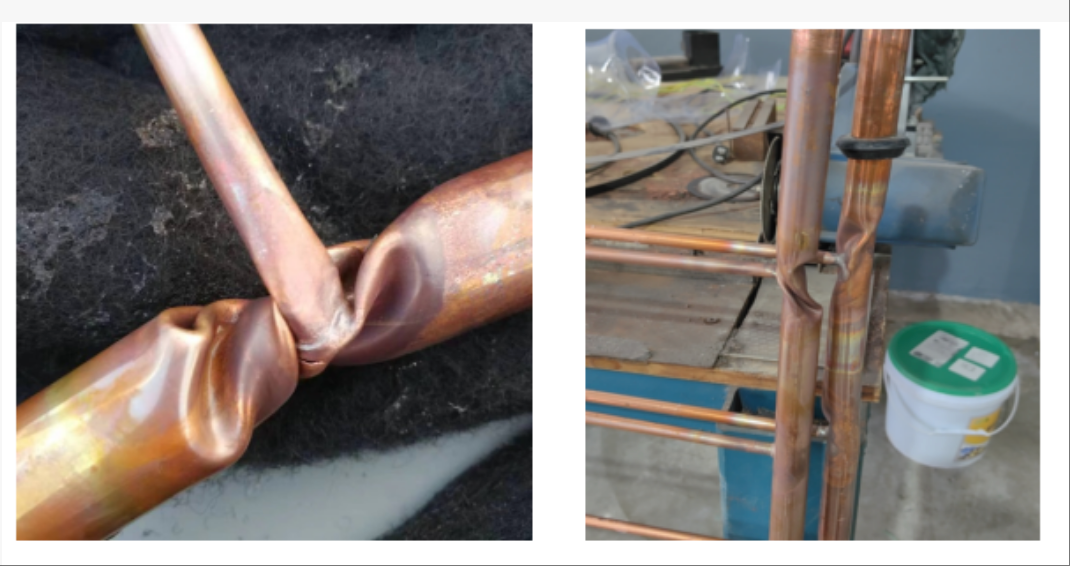
4. Connections and Joints
Hydraulic connections are the most sensitive part of a flat solar collector design. Most failures over time—leakage, deformation, or fogging inside the glass—come from incorrect connection methods.
4.1 Welding method
-
Welding creates a strong, permanent connection but must be performed with great care.
-
Use heat shields to prevent damage to seals and O-rings.
-
Do not allow excessive heat to reach the manifold, as it can cause distortion.
-
After welding, double-check alignment before tightening any additional fittings.
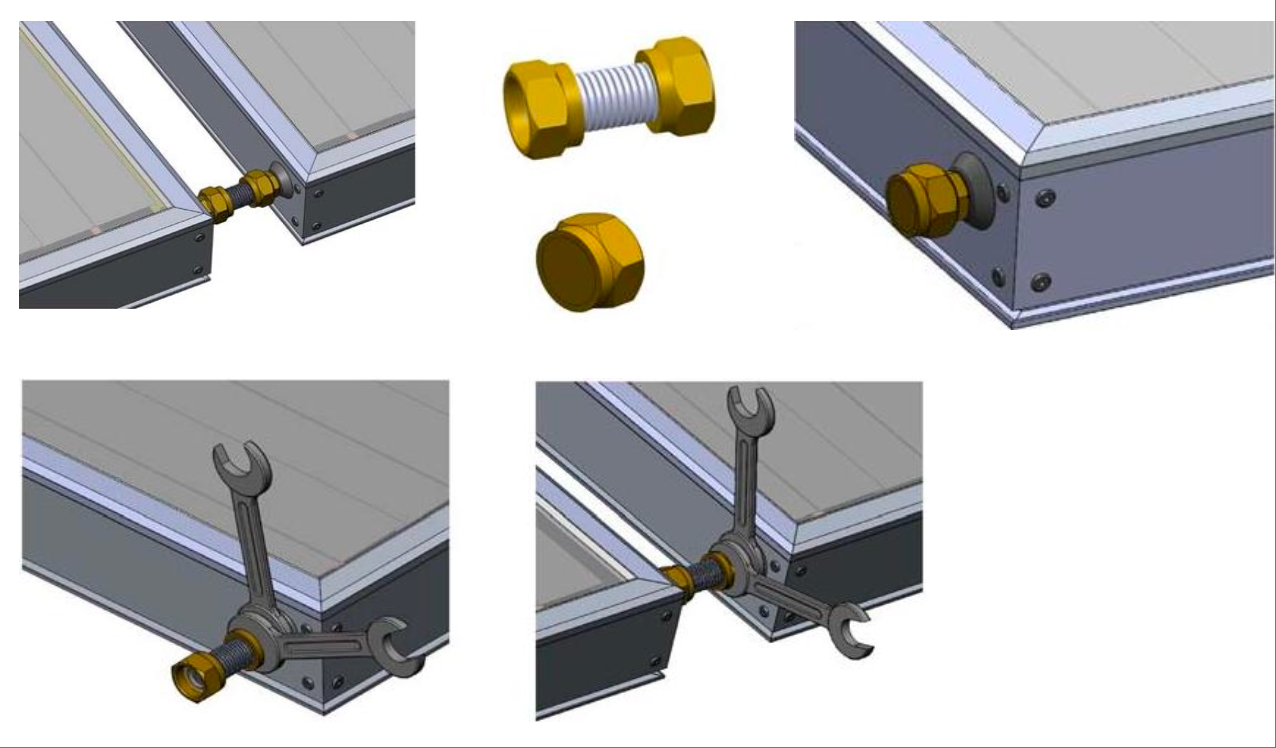
4.2 Threaded joints (most common method)
Most modern flat plate solar collector systems use threaded joints because they are reliable and easier to maintain. However, mistakes during tightening are very common.
-
Two-wrench rule: Always use two wrenches. One holds the fixed side of the collector, the other turns the nut. This prevents torque from twisting internal copper tubes.
-
Avoid overtightening: Too much force can distort internal waterways and cause leaks.
-
Proper sealing: Apply PTFE tape or solar-grade sealing gaskets.
-
Common mistakes:
-
Using a single wrench → internal tube twisting.
-
Overtightening beyond manufacturer limits → cracks or leaks.
-
Using pliers or pipe wrenches → damage to connection surfaces.
-
-
Field experience shows: Most collectors last 20+ years with no issues. When problems occur, they are almost always caused by poor installation—especially at joints. Improper connections often result in leaks or misting inside the glass.
5. Pipework Insulation
No solar water heater installation is complete without proper insulation. Even a highly efficient flat plate solar collector system can lose massive amounts of heat if the pipes are poorly insulated.
-
Material selection: Use high-temperature-resistant insulation such as EPDM, nitrile rubber, or polyurethane foam rated for solar applications. Ordinary insulation breaks down under UV and heat.
-
UV protection: Pipes exposed to sunlight must have insulation with UV-protective outer layers. Otherwise, cover with aluminum foil or protective casing.
-
Thickness:
-
Pipe < 25 mm diameter → insulation ≥ 20 mm
-
Pipe ≥ 25 mm diameter → insulation ≥ 30 mm
-
-
Joints and elbows: Pay special attention to bends, valves, and T-joints. These are frequent heat loss points.
-
Cold climate consideration: Use frost-resistant insulation to avoid freezing damage.
-
Secure fixing: Ensure insulation is firmly attached so it does not shift, crack, or degrade over time.
Proper insulation not only preserves solar flat collector efficiency but also protects users from burns and prevents condensation.
Conclusion
The correct installation of flat solar thermal collectors is a decisive factor in ensuring their performance and longevity. While the product itself is designed to operate for decades, installation mistakes can reduce efficiency, cause leaks, or lead to early failures.
To summarize the essentials:
-
Handle carefully – Do not expose to sun before installation; cover during work.
-
Set the correct angle – Between 20°–70°, ideally equal to local latitude.
-
Orient properly – South-facing in the Northern Hemisphere, north-facing in the Southern Hemisphere.
-
Connect with precision – Use two wrenches for threaded joints; avoid overtightening.
-
Insulate thoroughly – Choose UV- and heat-resistant insulation with sufficient thickness.
By following these principles, a domestic solar collector system will reliably deliver hot water for 20 years or more, with minimal maintenance and maximum efficiency.